Building the WASM from source code
These instructions are based on the outline here: https://github.com/ElementsProject/libwally-core#webassembly and are targeted at a clean Ubuntu 22.04.1 minimal install.
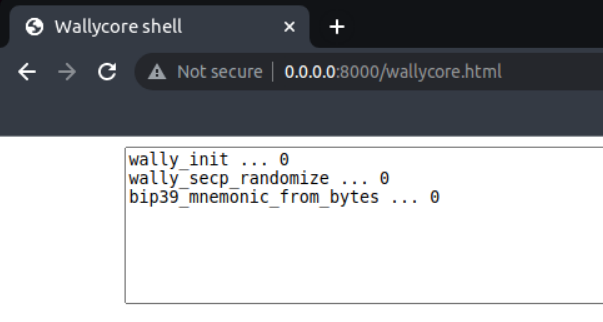
The output of the below is wallycore.wasm one simple example HTML page.
Install scriptIf you don't want to step through each command there is a complete shell script at the end of this page you can run which will perform all steps in one pass.
Dependencies
sudo apt update -y
sudo apt upgrade -y
sudo apt install git curl build-essential autoconf libtool python3-dev -y
Libwally source code
mkdir ~/libwally-example-build
cd ~/libwally-example-build
git clone https://github.com/ElementsProject/libwally-core.git
cd libwally-core
Initialize the libsecp sources (only needs to be run once)
git submodule init
git submodule sync --recursive
git submodule update --init --recursive
Autogen and Yarn
./tools/autogen.shNote that the following lines should be run as one command.
curl -sS https://dl.yarnpkg.com/debian/pubkey.gpg | sudo apt-key add -
echo "deb https://dl.yarnpkg.com/debian/ stable main" | sudo tee /etc/apt/sources.list.d/yarn.listsudo apt-get update -y
sudo apt-get install yarn -yEMSDK
cd ~
git clone https://github.com/emscripten-core/emsdk.git
cd emsdk
./emsdk install latest
./emsdk activate latest
cd ~/libwally-example-build/libwally-core
source $HOME/emsdk/emsdk_env.sh
export PYTHON_VERSION=3Build
If the last few lines of output from running the following are emcc warnings and errors, do not worry.
./tools/build_wasm.sh --enable-elementsUsing the output WASM in a web page
The build succeeded if there is a wally_dist folder. Move into that folder and serve it as a webpage:
cd wally_dist
python3 -m http.serverOpen http://0.0.0.0:8000/wallycore.html in a browser.

The JavaScript that makes the calls within wallycore.html is shown below. It is located within the first <script> tag. The methods executed by Libwally follow the ccall function calls:
var element = document.getElementById("output"),
wally_example = function() {
const e = Module.ccall;
element.value = "wally_init ... " + e("wally_init", "number", ["number"], [0]);
var l = new Uint8Array(32);
window.crypto.getRandomValues(l), element.value = element.value + "\nwally_secp_randomize ... " + e("wally_secp_randomize", "number", ["array", "number"], [l, l.length]);
var n = new Uint8Array(40);
window.crypto.getRandomValues(n);
var a = Module._malloc(32);
element.value = element.value + "\nbip39_mnemonic_from_bytes ... " + e("bip39_mnemonic_from_bytes", "number", ["number", "array", "number", "number"], [null, n, n.length, a]), element.value = element.value + "\n\t" + UTF8ToString(getValue(a, "*")), element.value = element.value + "\nwally_free_string ... " + e("wally_free_string", "number", ["number"], [a]), Module._free(a)
},
Module = {
preRun: [],
postRun: [wally_example]
}To output the available wallycore functions to the page, replace the code above (i.e. the JavaScript within the first <script> tag) within wallycore.html with this and refresh the page:
var element = document.getElementById("output"),
wally_example = function() {
var methods = [];
for (var m in Module) {
if (typeof Module[m] == "function" && Module.hasOwnProperty(m)) {
element.value = element.value + "\n" + m;
}
}
},
Module = {
preRun: [],
postRun: [wally_example]
}Libwally Ubuntu build script
The following is just all of the above compressed into one script. Save the following script commands in a file named libwally_ubuntu_build.sh and then run it like this:
bash libwally_ubuntu_build.shYou will be asked to authenticate as [sudo] and the script will run.
#! /usr/bin/env bash
set -e
sudo apt update -y
sudo apt upgrade -y
sudo apt install git curl build-essential autoconf libtool python3-dev -y
mkdir ~/libwally-example-build
cd ~/libwally-example-build
git clone https://github.com/ElementsProject/libwally-core.git
cd libwally-core
git submodule init
git submodule sync --recursive
git submodule update --init --recursive
./tools/autogen.sh
curl -sS https://dl.yarnpkg.com/debian/pubkey.gpg | sudo apt-key add -
echo "deb https://dl.yarnpkg.com/debian/ stable main" | sudo tee /etc/apt/sources.list.d/yarn.list
sudo apt-get update -y
sudo apt-get install yarn -y
cd ~
git clone https://github.com/emscripten-core/emsdk.git
cd emsdk
./emsdk install latest
./emsdk activate latest
cd ~/libwally-example-build/libwally-core
source $HOME/emsdk/emsdk_env.sh
export PYTHON_VERSION=3
./tools/build_wasm.sh --enable-elementsUpdated 3 months ago